


Are you tired of scrolling through your photo album and feeling underwhelmed by the lackluster images? Have no fear,AirBrush Studio is here! If you’re a Mac user looking for an easy-to-use editing tool to take your photos to the next level, then look no further. Say goodbye to dull, uninspired pictures and hello to stunning visuals that will have all your friends asking how you did it. In this post, we’ll dive into why AirBrush Studio Mac is the top editing tool for Mac users and how it can help revamp even your most lackluster shots. So grab a cup of coffee and let’s get started on transforming those mediocre photos into extraordinary works of art.
What is Airbrush Studio?
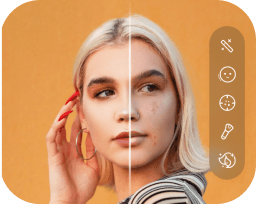
Airbrush Studio is a powerful photo editor for Mac that lets you easily transform your photos into beautiful works of art. With Airbrush Studio, you can remove blemishes, add special effects, and even change the color or texture of your photos!
Airbrush Studio is a great tool for anyone looking to revamp their photos and make them look their best. Not only is Airbrush Studio easy to use, but its wide range of features means you can create any type of photo alteration you desire. Whether you need to remove blemishes or add special effects, Airbrush Studio has everything you need to make your photos look their best.
How to Download and Install Airbrush Studio on Mac?
Airbrush Studio is a top editing tool for Mac that lets you give your photos a professional look. Here’s how to download and install it:
1. Open the App Store on your Mac and search for “Airbrush Studio.” Click the app’s icon to install it.
2. Once Airbrush Studio is installed, open it up and click “New Project.”
3. In the New Project window, select “Photo” as the type of project you’re creating, and then click “Next.”
4. Select a photo from your library or take a new photo using the camera on your Mac. (If you want to start with a recently edited photo, drag it from the Photos app onto the Airbrush Studio window.) Click “Next” to continue.
5. In the next window, choose which tools you want to use in your project. (See below for more information about each tool.) Click “Next” to continue.
6. Choose a color scheme for your project in the Colors panel (below). You can also adjust various settings in this panel, such as brightness and contrast, if you need to make any changes before starting your project. Click “Start” to begin editing!
Conclusion
AirBrush Studio is a powerful photo editing tool that is perfect for professionals who is looking to revamp their photos. With its variety of tools, AirBrush can help you achieve the look you want for your photos in just a few minutes. Whether you are looking to add some life to your shots or simply make them more professional, AirBrush Studio is an excellent choice for professionals looking to improve their photography skills.


